Almond Flour vs. Coconut Flour

Now that you’ve been reading here with me for awhile, you know why I use almond and coconut flour to bake with (no grains–holla!), but I realized that I’ve never explained why I tend to use them together, or their baking properties or anything like that.  So let’s talk grain-free flours.

First of all, nutrition-wise they are both awesome!  Almond flour is full of healthy monounsaturated fats, vitamin E and magnesium.  It also packs a protein punch!  Here’s a great post from Elena’s Pantry that goes really in depth about why almond flour is the cat’s pajamas.  Coconut flour is high in fiber and protein, and has a naturally sweet taste–which is ideal for baking.

In all of my muffin recipes, I use a combination of almond and coconut flour.  One reason I do this is that it cuts the cost of the recipe.  Before I explain this completely, you should know that a little coconut flour goes a long way.  It is a very thirsty flour and you don’t have to use much of it.  That is one reason that many recipes that solely use coconut flour also call for an ungodly amount of eggs.  Coconut flour soaks up moisture like crazy!  So back to price.  As it turns out, almond flour and coconut flour cost about the same price per pound.  But when baking you only have to use a very small amount of coconut flour vs almond flour.  So consider this….let’s say that a cup of almond or coconut flour costs $2.50.

If I have a recipe for muffins that calls for 2 cups of almond flour, the total cost alone of flour for that recipe is $5.

But if I decide to sub in some coconut flour for almond flour, I would do this:  3/4 cup almond flour + 1/4 cup coconut flour (and add an egg for extra moisture).  That brings the total cost of flour for the recipe down to $2.50, so it is well worth it to make the change!!  This doesn’t compromise the taste or texture of the recipe (in my opinion).

I would not usually ditch almond flour solely to bake with coconut, and the ratio above is only one I can vouch for in muffins or sweet breads.  I am normally not a fan of baked goods made only with coconut flour (although they do work well sometimes, it’s just not my preference).  If a recipe has too much coconut flour, sometimes the baked good in my mouth feels a little heavy and hard to swallow.

Another reason that I think it’s a good idea to sub out the some of the almond flour in a recipe is because almond flour has recently gotten some press for being high in Omega 6 fatty acids.  Now don’t freak out–you can read the article I linked to find out more about it.  And remember, you can find articles floating around the interwebz to support or bash nearly any health theory there is.  The gist of this theory is that eating too much of these Omega 6’s can cause inflammation–the exact thing we are trying to eliminate in our body by eating this way in the first place.  My theory is don’t overdo it!  If you ditch a standard American diet just to go paleo and eat strictly baked goods made with almond flour, that isn’t ideal.  These are treats, and you should be eating more meat, fruit and veggies than baked goods anyway.  But it makes me feel a little better to lower the amount of almond flour and sub in some coconut flour (and therefore extra fiber!) because my boys do love their baked goods.  And hello?  They are kids.  I hate to tell them no, especially when I feel really good about the ingredients I bake with!

I hope that was a good intro lesson on the difference between almond and coconut flour and why I use them both together a lot (I promise it’s not because I enjoy sending you out on wild goose chases at the supermarket).  If you have any other questions, just ask away!  If I don’t know, I will research it, and we will learn together.


Morning Glory Muffins (SCD, Paleo)

**Don’t forget to register for the Tropical Traditions coconut oil giveaway!**

I am so excited to share these muffins with you, because not only are they amazing, but they have no added sugar or honey–they are sweetened only with dates!  But I promise, you will not feel like you are missing out on anything when you’re eating them.  This powerhouse of a muffin is nutritionally dense and super-satisfying.  And my kids LOVE them!  The ingredient list is long, but don’t be intimidated–all of the ingredients are good for you.  Let’s get started.

This recipe was adapted from the Morning Glory Muffin recipe in the awesome cookbook “Paleo Comfort Foods”.  I changed it up a good bit to suit our tastes.

Morning Glory Muffins (makes 13-14)

3/4 cup almond flour

1/4 cup coconut flour

3 eggs

6 medjool dates, pureed

2 cups of shredded carrots

1 apple, peeled, cored and shredded

1/2 cup raisins

1/4 cup coconut oil

2 Tbsp applesauce

3/4 cup shredded, unsweetened coconut

1.5 tsp baking soda

1/2 tsp salt

1 Tbsp. cinnamon

1 tsp. orange extract

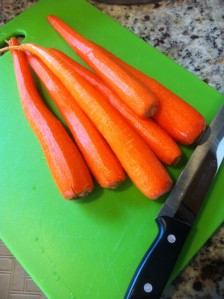
I know, like I said, a lot of ingredients!  But that’s what makes it so yummy!!  So start with your carrots.  If you’re using big carrots like this, you will need 2-3 to get your 2 cups of grated carrots.

february18, 2012 019

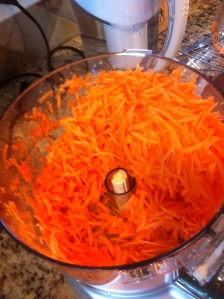
Turn those carrots into this:

february18, 2012 020

Pretty!

Now do the same for your apples (not pictured because I’m always in a mini-panic with the apples, wanting to mix them into the batter before they turn brownish.  I have issues).

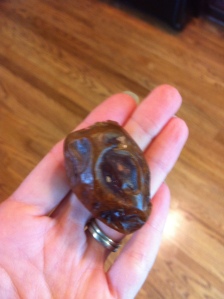
Now for the dates.  If you’re not familiar with dates, this is what they look like.  I use Medjool dates.

february18, 2012 021

You need to cut into them and remove the pit, which is very easy to do:

february18, 2012 022

See that pit?  Take it out.

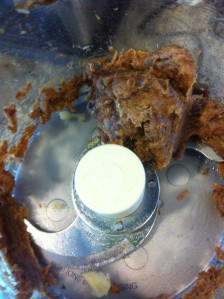
Then put all your dates into the food processor and turn them into this.  Kind of a date paste.

february18, 2012 024

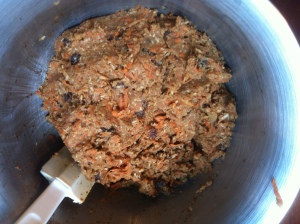
Now as far as these muffins go, I just throw it all in a bowl and mix it up.  No particular order, but I do all the wet stuff first and then the dry stuff.  Once everything is in there, you mix it up and this is what you’ve got:

february18, 2012 025

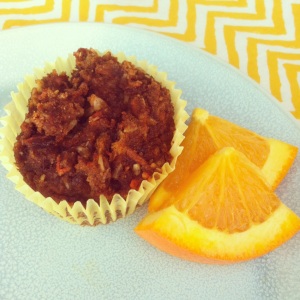
It’s a very dense batter–it’s supposed to be.  Spoon it into your muffin cups and bake at 350.  I’m terrible at timing my food while it bakes.  I’m just always in the kitchen so I check on it often.  These bake between 20-30 minutes.  My favorite thing about these muffins is all the different flavors with that hint of orange in the background.  I just love them!  And I think you will too.  Enjoy!

february18, 2012 037

**No, really.  I knew you’d forget.**

Tropical Traditions Giveaway!

**Congratulations to Jessica C., who won the Tropical Traditions coconut oil!!**


If you’ve been reading my blog for any amount of time, you know I am a fan of Tropical Traditions.  I have used their coconut oil, organic coconut flour, and most recently have even purchased grass-fed beef from them.  But up until now, I have never tried their organic Gold Label Virgin Coconut Oil.  In anticipation of this giveaway, Tropical Traditions generously sent me a quart of their gold label virgin coconut oil to try!  Way to make a girl feel fancy!

The first thing I did was go to their site to read how this oil is different from “regular” coconut oil (you can read more about that below in this post).  I not only like the fact that this is one of the highest quality coconut oils on the market, but I love that it isn’t mass-produced, rather made by families on coconut farms.  When your food gives you the warm fuzzies AND tastes good–that’s the best!

Initially, one of my favorite things about Tropical Traditions coconut oil is that it comes in glass jars.  I prefer glass over plastic any day (and pretty much every brand of coconut oil I can think of available in stores comes in plastic jars).  I keep the glass jars and reuse them for yogurt and homemade broth, which cuts down a lot on waste.

Personally, I use coconut oil most often when baking, so I wasn’t sure if I would notice a difference in the quality of the gold-label coconut oil in a recipe.  So I decided the best way to find out would be….to taste it.  That’s right, I went at it, straight up with a spoon!  The other brand I had on hand just tasted oily and then left a coconut-ty aftertaste in my mouth.  Not unpleasant, by any means.  But I have to say that when I tried the Gold Label Virgin Coconut oil, it was oily, but had a richer flavor like coconut manna or coconut butter (pure ground coconut).  So I will be interested to see if and how that flavor enhances my recipes.

Gold Label Virgin Coconut Oil - 32 oz.Win 1 quart of Gold Label Virgin Coconut Oil!
Tropical Traditions is America’s source for coconut oil. Their Gold Label Virgin Coconut Oil is hand crafted in small batches by family producers, and it is the highest quality coconut oil they offer. You can read more about how virgin coconut oil is different from other coconut oils on their website: What is Virgin Coconut Oil?
You can also watch the video they produced about Gold Label Virgin Coconut Oil:
Tropical Traditions also carries other varieties of affordable high quality coconut oil. Visit their website to check on current sales, to learn about the many uses of coconut oil, and to read about all the advantages of buying coconut oil online. Since the FDA does not want us to discuss the health benefits of coconut oil on a page where it is being sold or given away, here is the best website to read about the health benefits of coconut oil.

You have 5 different chances to win.  You can earn the first two entries by subscribing to the Tropical Traditions sales e-newsletter.  This is great because you will be informed on all of the sales and special offers they have going on, and if you’re like me, you want to know when coconut oil is going on sale!  This is a mandatory entry.  Once you have subscribed to the newsletter, come back to the Rafflecopter page and press the green “Enter” button.  After this step is complete, you can also “like” My Delicious Life” and/or “Tropical Traditions” on Facebook for 2 more entries.  Lastly, you can subscribe to this blog by clicking the “follow” button on the upper right hand side of the page.  The Rafflecopter feature below can walk you through all this.  This giveaway is open to my readers in the U.S. and Canada.  The giveaway will run until February 26 at 12 AM.

Click here to enter!

Disclaimer: Tropical Traditions provided me with a free sample of this product to review, and I was under no obligation to review it if I so chose.  Nor was I under any obligation to write a positive review or sponsor a product giveaway in return for the free product.

Cherry Vanilla Ice Cream (Dairy-Free, SCD, Paleo)

Getting the KitchenAid ice cream attachment has rocked my world.  The first flavor I ever attempted was this simple chocolate ice cream, and once I realized how easy and delicious it was to make your own ice cream, I’ve never looked back.  Not to mention that the stores aren’t bursting at the seams with delicious dairy-free ice cream sweetened only with honey.

One of my favorite treats from back in the day was Ben and Jerry’s Cherry Garcia Ice cream.  Or a chocolate-covered cherry blizzard from Dairy Queen.  Oh the fake goodness of it all.  So yesterday, when I realized that I had frozen cherries on hand, I knew what had to be done.

I don’t know how other ice cream makers work, but with the KitchenAid attachment, you have to plan ahead for your ice cream.  The bowl itself needs to sit in the freezer for 24 hours beforehand.  The bowl is insulated with a layer that contains water and the water freezes in there.  If you really like ice cream and you have a lot of room in your freezer, you may just want to keep it in there permanently so you can make ice cream on the fly, whenever you get a craving.  It is also good to start with cold ingredients, so I pop my canned coconut milk in the fridge for at least a few hours beforehand as well.

Cherry Vanilla Ice Cream

2 cans full fat coconut milk (I love the organic canned coconut milk from Earth Fare–it never separates and is so creamy!)

1 tbsp pure vanilla extract

2 cups of frozen cherries

1/4 cup honey

I think that this recipe would work fine with nearly any berry or fruit, although you may have to adjust the honey, depending on the tartness of your fruit.  These cherries are naturally sweet, so I used very minimal honey here.

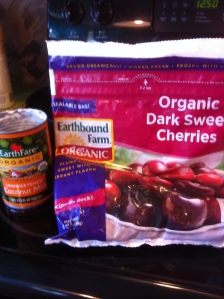
february 14, 2013 026

I buy the cherries at–you guessed it–Costco!

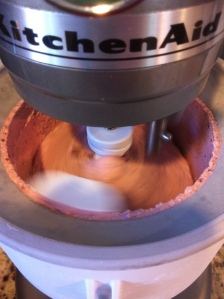
I puree my cherries in the food processor with about a half can of coconut milk (too much of any liquid in a food processor makes a big mess).  You can decide if you want big chunks of cherries in your ice cream or not.  I chose to completely puree them, because I knew the boys would balk at chunks o’ fruit in their ice cream.  Then I add the honey and vanilla extract.  Add this mixture to a bowl with the rest of the coconut milk and stir it up well.  Then remove your ice cream bowl from the freezer, pour the mixture in, and pop it on your KitchenAid.

february 14, 2013 027

You want to blend it for anywhere from 15-30 minutes, until it’s looking pretty ice-creamy.  At least until it looks like a respectable soft serve.

It is certainly edible at this point, but I like to transfer it to a freezer-safe container and let it firm up in the freezer for a few hours.

Then it looks like “real” ice cream when you scoop it out.

february 15, 2013 001


Obviously, the ice cream is fine on it’s own, but since it was Valentine’s day, and since I was trying to recreate the chocolate/cherry concoctions of junk food days past, I used a microplane/zester thingy to grate some homemade chocolate on top.  I think it would also be good with some really high-quality, dark chocolate chopped into it, or even just some Enjoy Life chocolate chips sprinkled on top.

And because it’s Friday, and because I’d like to try something new, why don’t you choose the next recipe for me to share?  Vote below!


My Heart

Yesterday, I made these cookies with the boys.  Well, I made them by myself, but we frosted them together after school.  There’s only so much “help” in the kitchen that a mama can take, right?  I kind of screwed up the cookies by rolling them out too thin.  I’m so used to doing crackers that I couldn’t seem to help myself.  So the cookies themselves are really thin and floppy.  I’m super impressed with the frosting though.  It is delicious and perfect for icing cookies.  The boys are CRAZY for the cookies–somehow they don’t seem to notice (or care about) the floppiness.  We used India tree natural food coloring and India Tree sprinkles, which were such a novelty for them.  Especially after I told Mario that the sprinkles weren’t on our diet (they contain sugar).  It’s like he’s getting away with murder every time he eats a cookie!

Anyway, I just wanted to introduce you to my boys–my heart.  They are the reason I spend all my days in the kitchen, and I wouldn’t change a single thing.  I recently realized that one of my favorite ways to show my love for people is by making them good food.  So you can imagine how much I love these kiddos.

Mario

Mario

Luigi

Luigi

february 14, 2013 017

I hope you were able to make something yummy for the people you love today.

Happy Valentine’s Day!

Chocolate….What More Can I Say?

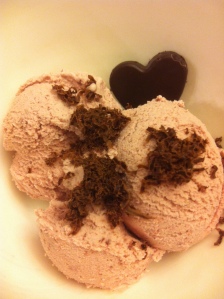
If you thought 3-ingredient gummies were easy, let me go ahead and blow your mind.  You can make your own chocolate at home….with just 3 ingredients.  And using the same molds you bought for the gummies.

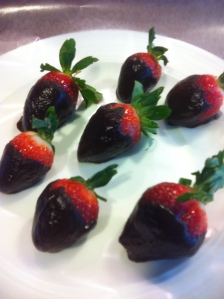
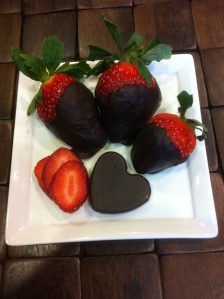
True story.  Look up at the top of my page–those are homemade chocolates.  And they are awesome.

The best way to describe this chocolate is rich.  And dark.  And kind of chewy, like a Rolo.  With a hint of coconut.

Sadly, chocolate (or more specifically, cocoa) isn’t allowed on the particular diet that we follow (SCD).  But the only person in our family who it technically bothers is Mario (and me if I overdo it).  So I do still make these every once in awhile to keep around the house for a treat.  While these chocolates are not SCD-compliant, they are technically paleo (you know the cavemen were all about the chocolate, right?) and refined sugar free, which is way better than any chocolate you can buy in the store.

I started off with a recipe from Chocolate Covered Katie for homemade chocolate bars, but she uses Stevia as a sweetener.  So I modified the recipe to work for us.

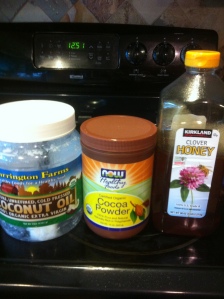
Chocolate

1/2 cup plus 1 tbsp. cocoa powder (preferably organic, preferably ethically sourced)

1/4 cup honey

1/4 cup coconut oil

February 12, 2013 007

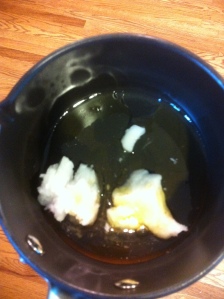
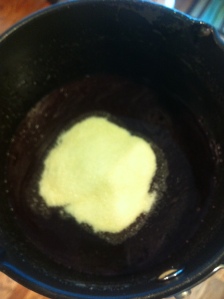
Melt the coconut oil and honey in a small saucepan.

pre-melt

pre-melt

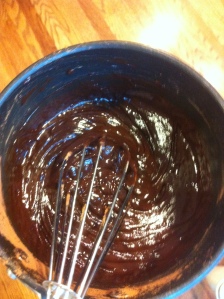
Then whisk in the cocoa powder.  It really is as easy as that.

February 12, 2013 009

Once you are to this point, you don’t want to be all slow about it.  Get the chocolate in the molds quickly, and transfer the molds to the fridge or freezer for the chocolate to harden.  If you wait too long, it will begin to goop up and the texture will get all weird.

This chocolate will melt easily and will need to be stored in the refrigerator.  Coconut oil becomes a liquid at 76 degrees, so that is why the chocolate is uber-melty.  But its uber-tastiness makes up for it.  Since we had a lot of strawberries on hand, I decided to dip some strawberries in it for a fun dessert for me and the hubs after the kids went to bed.

February 12, 2013 010

Which leads me to this point–the kids are now in bed and I am blogging and drinking wine and he is in the kitchen cutting up a honeydew.  Clearly, I got the better end of the stick tonight.  But I should go soon, because I’m ready to eat these.

Make some for your valentine tomorrow.  And if you don’t have a valentine, make some for yourself.  Because you’re awesome.  It’s true–you are!  You have great taste in blogs!

February 12, 2013 029

PS–if you haven’t “liked” the Facebook page for My Delicious Life, you should really do that now.  Throughout the day, I post links to great recipes and offer lunchbox ideas and let you know what recipes I’m working on.  It’s a laugh-a-minute type thing.  It’s basically like having me on speed-dial all day long.  Oh wait….I just lost you.

Oh well–happy chocolate-making!

DIY Gummies

Gummy candies are so awesome.  And kids love ’em.  But hiding behind their cute, chewy nature, is often corn syrup, artificial colors, wax, and lots and lots of sugar.  Which makes them not so awesome.  The good news is they are easy to make at home—without all that junk.  And you don’t have to view them as empty calories.  Did you know that gelatin is actually pretty darn good for you?  Not only is it a protein, but it is soothing to the digestive tract, which is great for kids like Mario, who have damaged stomachs.  Think about it–didn’t your mom always make you Jello for you when you were sick?

When we first started our new diet, I found a few gummy recipes on Pinterest that excited me.  Unfortunately, every time I made them, they looked good but tasted like…..well, to be frank, they tasted like gelatinized air.  Not appealing at all.  The problem was that to make gummies, you have to use so much gelatin–much more than if you were just making Jello.  And by doing that, the gelatin dilutes the taste of the juice down to….basically nothing.  I had given up on the dream of homemade gummies, until…..

I found this awesome recipe from Heather at Mommypotamus.  It seemed she had figured out the conundrum.  She used lemon and lime juice in her recipe, which were perfect because those juices are so tart and concentrated, that adding a large amount of gelatin to them doesn’t completely erase the taste.  So for months, I’ve been making these sour gummies (which really aren’t that sour at all) for the boys, and thinking that there was no way to do any other flavors, because I didn’t know of any other juice that was quite so powerful.  Until…..

I got a UTI a few weeks ago.  I know–more than you needed to know.  But because I got a UTI, I went out and bought pure cranberry juice.  Not the Ocean Spray diluted kind, with lots of water and sugar added.  But the concentrated $9/bottle kind.  And even though I mixed it with water, it was so sour it nearly turned my head inside out.  And I thought, how am I ever gonna finish this juice??  And then I realized–GUMMIES!!!  A new flavor!

So here’s what you’re going to need to make gummies:

gelatin (preferably a quality brand like this, but the Knox kind at the grocery store will also work)

honey

super tart juice

silicone molds

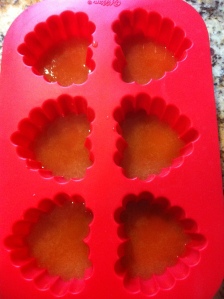
I have a ton of silicone molds.  Some I’ve ordered from Amazon, but many I bought locally at Joann Fabrics.  I used these today because I wanted to do Valentine themed gummies.

february 9, 2013 018 february 9, 2013 017

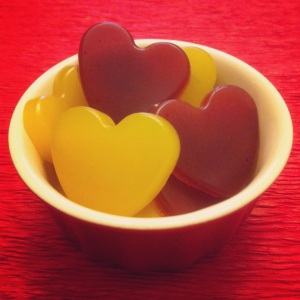
Today I made a few different flavors.  First I made lemon gummies, using the original Mommypotamus recipe.

Then I made a batch of cranberry lime gummies:

Total 1/3 cup of juice (half lime, fresh squeezed/half cranberry)

3 tbsp. honey

2.5 tbsp. gelatin

Lastly I made a batch of cranberry orange gummies:

1/3 cup of cranberry juice

1 tsp. of pure orange extract

3 tbsp. honey

2.5 tbsp. gelatin

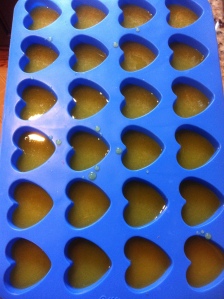
When making the gummies, you want to begin by putting your juice in a small saucepan.  Add your honey and stir it as well as you can.  Then sprinkle in your gelatin.  Do not stir yet, just let it absorb for a few minutes.  Then begin to stir (I use a wire whisk) as you heat it up on low-medium heat.  Once the gelatin has liquefied, you are ready to spoon it into your molds.

february 10, 2013 010

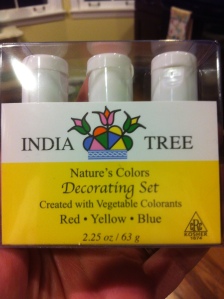
If you want to alter the color of your gummies, I suggest using India Tree natural food coloring.  It is pricey, but it comes in handy for these and for making icings, etc.  I get it at Whole Foods, but I know you could also order it online.  The good thing about the cranberry juice is that those gummies will be nice and red on their own.  For the lemon gummies, I added a drop of the yellow food coloring just to make the color pop.

february 9, 2013 016

I never fill the ones like these all the way up, or the gummies would be massive.  But use your own judgment.

february 10, 2013 007 february 10, 2013 008

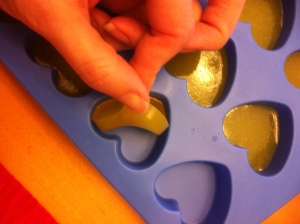
Now, you can leave them to sit and firm up at room temperature, or if you’d like to speed the process along, just put them in the fridge.  When they are ready, they will peel out very easily.

february 10, 2013 011

And you’re done!  It is literally that easy.  The boys did a taste test, and Mario liked the cranberry orange ones the best.  Luigi liked the lemons ones the best.  They both tolerated the cranberry lime, but it was clearly the loser of the three flavors.

I store the gummies in a glass jar in the fridge.  Since they have no preservatives, I try not to make more than a week’s worth at a time.  These are great treats for sharing with friends.  Not only are they kid-friendly, but they are naturally grain, dairy, egg, and nut-free, which makes them extremely allergy-friendly.  Not to mention a great treat to hand out with Valentine’s cards at school.  Let’s face it, these blow conversation hearts right out of the water!

february 10, 2013 017

february 10, 2013 018

Stocking your Grain Free Pantry

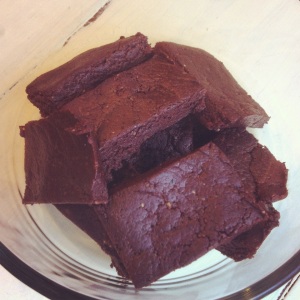
You know what is awesome?  When you come across a new recipe, and you have a little bit of free time right then, and you have ALL of the ingredients on hand.  And you make it, and it is amazing.  Kind of like I did this morning with this recipe for Raw Brownie Bites from Comfy Belly.

february 8, 2013 021

On the other hand, do you know what is awful?  When you find an awesome recipe, and you really want to make it, but you read the ingredient list and realize you have none of it on hand, and then you get frustrated and go eat a bag of Cheetos instead.  That is just terrible.  And I know how it feels.

It took me weeks, maybe months of eating like this, to get to the point where I almost always have the correct ingredients on hand to make recipes on the fly!  So even though I really need to go shopping and restock my pantry after a manic week of baking, I thought I’d give you a peek inside to let you know what ingredients I always have on hand.  Maybe you can add one or two items a week to your current shopping list, while omitting some other items…..like Cheetos.

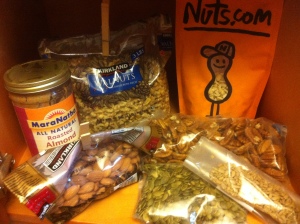
First and foremost–nuts and seeds

february 8, 2013 016

Here I have almonds, walnuts, cashews, pecans, pumpkin seeds, sunflower seeds, and almond butter.  Not pictured, but we also keep sunflower seed butter and peanut butter on hand.  Also not pictured, almond milk.  Be very careful when buying almond milk–most almond milk has sugar as the second ingredient (yes, evaporated cane juice is just another way of saying sugar).  Check the ingredients to insure that it is unsweetened.  For baking, you want to get the nuts and seeds as raw and unprocessed as possible.  I also keep salted cashews on hand for snacking (although these raw ones would be healthier).

Where to buy nuts and seeds:  Costco sells bagged almonds, walnuts, and pecans.   You can also get nuts and seeds from your grocery stores bulk bins.  If you like to buy a lot at a time or if you live in a more rural area with fewer options, you could order from nuts.com.  I love nuts.com and get a lot of stuff from them, including blanched almond flour.  Prices and customer service are great!

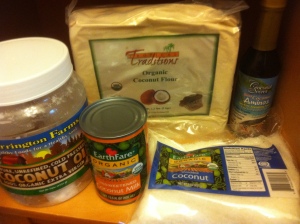
Next up:  coconut products

february 8, 2013 018

Seen here are coconut oil, unsweetened full-fat coconut milk, coconut flour, shredded unsweetened coconut, and coconut aminos.  Coconut aminos are used as a soy sauce substitute in paleo/grain-free cooking.

Where to buy coconut products:  Coconut oil is becoming more readily available.  I get mine at Costco, but it is also available at health food stores.  If anyone has seen it at a more mainstream grocery store, let me know.  Coconut milk is available in most grocery stores in the ethnic food section.  Coconut flour can be found in most health food stores, and I know at least one brand (Bob’s Red Mill) is even on the shelf at Publix.  Shredded, unsweetened coconut flakes may be available in most places, but I just grab them at Earth Fare when I’m there.  As for the coconut aminos, you would have to get those at a health food store.  It is in the condiment section.  Almost all of these products are available through Tropical Traditions.

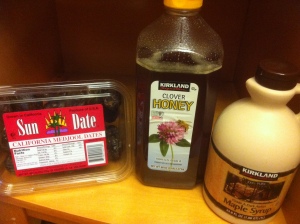
Sweeteners

february 8, 2013 019

Medjool dates, honey, and pure maple syrup (if your eating plan allows)

Where to buy these sweeteners:  I am lucky that Costco carries all of these, but I think they would all be readily available at most grocery stores.  In a grocery store, you should check around the produce section for the dates.  They could also possibly be with the dried fruit.  If you cannot find medjool dates in your grocery store, you can order them online from nuts.com.  As far as honey goes, buy the best quality that you can afford.  Local honey is great.  We try to keep a smaller container of local honey out to drizzle on our yogurt–things like that.  But I use the giant Costco honey when baking.  Check your label carefully when buying maple syrup–there should only be one ingredient:  maple syrup!

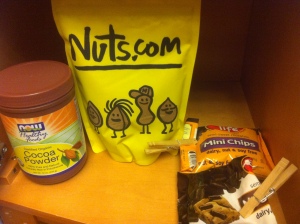
Chocolate (it’s a food group, right??)

february 8, 2013 017

Cocoa powder, raw cacao powder, and Enjoy Life chocolate chips

**Chocolate isn’t allowed on the SCD diet, so we don’t use it that often.  But I do keep it on hand for special treats or for when I’m baking for others.**

So what is the difference between cocoa and cacao?  I’m still not 100% clear, but it is my understanding that cacao is not heat processed and is considered raw.  Cocoa is a more processed form of cacao.  I do not use them interchangeably–I just tend to use whatever the recipes call for.

Where to buy chocolate products:   Cocoa powder can be found at any grocery store.  Raw cacao powder is usually only in health stores.  I order it from nuts.com, because they have a better price on it.  Enjoy Life chocolate chips do contain sugar, so they should be used sparingly.  The good news is that they do not contain dairy, gluten, or soy.  They are also much more delicious (and only slightly more expensive) than other brands.  I have seen them at Target and at health food stores.

Who can forget blanched almond flour?

January 24, 2013 039

I buy mine in 25 lb quantities, but you can order it in 5 lb bags from both Honeyville and nuts.com.

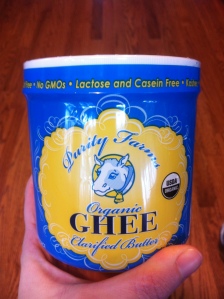
And then comes ghee.

January 29, 2013 015

If you are not familiar with ghee, it is clarified butter.  So it is like butter, but the milkfat has been removed, thereby removing the lactose and casein.  Ghee is great for cooking and baking, and it is shelf stable, so you don’t even have to refrigerate it!  You can make your own, but I like to buy mine–all of the health food stores in our area carry it (it is on the shelf with the oils).  If you decide to make your own, be sure to start with organic butter from grassfed cows.  And what do you know?  Nuts.com carries ghee too!!

Other items that are not pictured that I always try to keep on hand are organic applesauce and organic raisins, which are pretty easy to come by.  Just remember–applesauce should only contain apples and raisins should only contain raisins 🙂

I hope this helps.  I remember that feeling of frustration when I used to peruse recipes, thinking I would never be in a place where these were the normal things in my pantry.  I hope this “inventory” can help you as you shop, and will give you the freedom to make that next amazing recipe you come across.

Upon Leaving the Bubble

Today I got an email with the question:  How do you handle eating out or eating at other peoples’ homes?

I’ll start by saying that we don’t eat out very much at all.  One reason for this is obviously that our dietary needs make eating out a bit more tricky.  But also, now that we are eating more quality foods at home, our food budget has increased quite a bit.  After buying groceries, eating out usually just isn’t in the budget.  One other thing (and I am only speaking for myself on this one) is that I have noticed that I just don’t feel well after eating out.  Not all the time, but a lot of the time.  The same thing happens to me sometimes when I try to take a shortcut in prepping my food by using certain pre-packaged/pre-made items.  I think it has to do with preservatives or MSG or something like that.  For instance, my aunt kept our kids one night a few weeks ago, and Jason and I decided to treat ourselves by getting takeout from Carrabba’s.  I got my very favorite dish–Pollo Rosa Maria, and it didn’t taste as good as I remembered it.  And the next day I felt sluggish and blah, and I didn’t want my leftovers.  So for me, I would normally opt to eat at home and feel better.

But alas, as much as I love life in our little food bubble at home, sometimes you’ve gotta get out.  Case in point–tonight my boys’ school is having “Spirit Night” at Chik-Fil-A.  Yet another one of those “special occasions“.  Even better, (note my sarcasm here) the class with the highest attendance wins an ice cream party.  Hurrah.  This is where families from the school go eat dinner at Chik Fil A, and CFA donates a portion of the sales to the school’s PTO.  Frankly, I’d just as soon write a check to the PTO and stay home in my jammies, but I’m just anti-social like that.  My kids were PUMPED about this.  It really is a novelty for a kindergartner to see their teacher out in public, and away from school.  Last time, Luigi asked his teacher how she got there, and then spent the rest of the night marveling that she drove a car!!  And I have to admit that I enjoy seeing them with their friends.

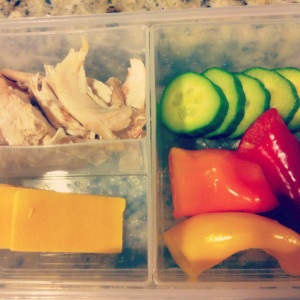
So we talked about it as a family last night, and I asked them how they wanted to handle the food situation.  I like to give the boys as much control over their food as possible.  We also employ “compromises” a lot, which they are very open to.  Mario immediately told me he wanted me to pack him a dinner, and Luigi immediately told me he wanted to eat at Chik Fil A.  I was fine with both of these decisions, as Mario is more prone to stomach upset, and Chik Fil A–while not a “healthy” restaurant by any means–does offer a good variety of choices for people with dietary issues.  So I sent this dinner for Mario:  leftover roast chicken, veggies, and cheese.

february 5, 2013 023

I told him he could order a cup of fruit at CFA for dessert, which he was thrilled with.  Luigi had grilled chicken nuggets, a fruit cup and 100% juice.  I can live with that.

As far as eating out in other situations, we research restaurants well in advance.  Most of the time I end up ordering for the kids from the adult menu, because there are more healthy choices available there.  Grilled shrimp is always a hit with both boys, so sometimes I will let them split an adult sized entree.  One national chain that we have had great luck at is PF Changs–this chain is very diligent about offering gluten-free items.  Yes–the tamari sauce they use is soy-based, but for one meal, I don’t sweat it.  Our boys went bananas over the lettuce wraps there and for Mario, they prepared a shrimp, chicken, and veggie dish with no sauce that he devoured.  Ruby Tuesday is another restaurant that seems to be going above and beyond to offer healthier choices.  You can get their pasta dishes prepared with spaghetti squash now.  They have a grilled chicken on their kids menu and I asked if they could grill shrimp instead of fry it for Mario, and they did it.  The kids’ side dishes include apples and grapes, which I think is perfect!

When we travel, I spend more time researching local restaurants than looking at hotels!  We always opt for a hotel room with a refrigerator.  I pack breakfast and lunch options and snacks.  If you are traveling and you need ideas, the internet is obviously your friend, but I tend to crowdsource questions as well.  Put it out there on Facebook where you are traveling and ask like-minded friends for restaurant ideas.  It was through internet searching that I found this amazing restaurant in Chattanooga and this one in Nashville.  Being able to find a nice restaurant that meets all of our needs and that the whole family enjoys usually ends up being the highlight of my trip!

As far as eating when you are at friends’ houses…..this one can be tricky if you let it.  I suppose it all depends on the situation.  First of all, I try to surround myself with like-minded people.  No, all of my friends are not hard-core grain-free, but for the most part they care about what they eat.  And they also understand the journey that we are on.  I find that when explaining your situation to friends, your tone can make all the difference.  I always explain that we eat this way because it is the way we feel the best.  These are some decisions that we had to make for us–I never present my ideas in a way that make it seem as if I am judging what other people are eating.  Some ideas for eating in groups–Bring food!!  What host doesn’t appreciate help with the food?  You don’t have to point out that what you are making is special-diet related.  Make something delicious that your family can eat, and it will stand on its own!  If you are going to a potluck, offer to bring one of the bigger, main dishes so that you know you will have something to eat.  If your host asks you in advance for ideas of things they can make that will work with your diet, do not be shy!  Tell them–they are asking because they want to be a good host and have food for you.  Give them simple options (for instance, I would probably say–any kind of meat seasoned with dry spices would be great!  Could I bring a side dish or dessert?).  I go to a weekly bible study and at first, I was self-conscious.  I didn’t want anyone to think that I was turning my nose up at their food, so I always ate before hand and just had water or coffee while I was there.  Now, I sometimes bring myself a little muffin to eat and everyone understands.  I always take my own snacks for my kids when we go places. but that isn’t so uncommon.  I have resigned myself to baking and having food for every occasion imaginable.  You can’t expect other people to always cater to your needs, so be cheerful and ready to fend for yourself at times!

I hope this helps anyone who is planning on making a dietary change.  If you have any other questions, please ask away–it’s fun hearing your questions!  I would also love to hear about any restaurants you know of that do a great job of helping out the food-challenged among us!


Coconut Shrimp–So Easy, Even I Can Mess it Up

I miss fried chicken.  Maybe it’s the fact that my hubs and I are watching Breaking Bad marathons every night (Los Pollos Hermanos, anyone?).  Or maybe it’s just knowing I can’t have it.  Quite possibly there is a conspiracy at Publix to pump the delectable smell of fried chicken out in mass quantities every time I’m there to buy groceries, which I do not appreciate, by the way.

Anyway, I miss it.  I miss that crispy, greasy breading.  And with the Superbowl coming up this week, all I could think about were fried chicken wings.  Not that I care anything about football, but I care very much for the food that goes along with it.  All that to say….I do not have a good fried chicken recipe to share.  I know, that was a very demented lead-in, wasn’t it?

But seriously, this recipe is pretty darn healthy while satisfying that need for protein surrounded by fried breading.  While it does work for the paleo and SCD lifestyle, it is so delicious and accessible that I think anyone would enjoy it.  If you are someone who follows a special diet, this would be a great dish to make for friends or when you have company, because it feels so un-special-diet-y.  Know what I mean?

This dish is so easy (and I’m sure not at all original) that I hate to present it as a formal recipe, so let’s just call it an easy dinner idea.

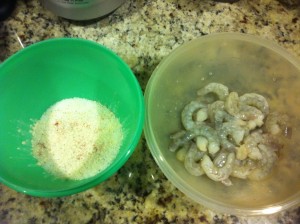
Basically, you just need some shrimp (peeled, deveined, de-tailed, if you are so inclined), a couple of eggs, some shredded, unsweetened coconut, coconut oil, and any spices you might like.  You should also ban any unnecessary persons from the kitchen.  I say this because my aunt was here talking to me as I was doing this, and I totally screwed up the first half of the batch.  It is also worth pointing out that the easier the recipe is, the more likely I am to ruin it.  Give me complicated any day–it forces me to keep my head in the game.

february 3, 2013 027

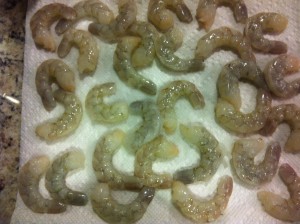
You’re going to put your shredded coconut in one bowl (I used a little over a cup).  To the coconut, I added about 1/4 tsp each of salt, pepper and garlic powder.  Then maybe a few sprinkles (1/8 tsp?) of paprika.  Choose whatever spices you think would be good–the world is your oyster!  Or shrimp, as the case may be.  In a separate bowl, whisk up a few eggs (not pictured because this is the crucial step that I forgot at first–and I wasn’t even drinking wine!!).  Then you are going to want to lay your shrimp out to dry off a bit.

february 3, 2013 028

Getting the excess moisture off will keep the shrimp from “spitting” at you too much when you begin frying it.  While the shrimp are drying off, scoop some coconut oil into a cast iron skillet and let that start heating up on medium heat.  I only add enough to make the oil about a half inch deep.

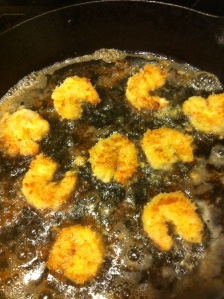
Now take your shrimp and dip it into your egg.  Then transfer it over to the bowl with coconut and coat each shrimp well.  When the oil is hot enough (test it by dropping a few coconut flakes in and make sure they start bubbling immediately), put your shrimp in the oil.

february 3, 2013 031

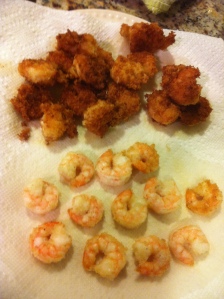
The shrimp doesn’t have to cook long at all.  I am terrible about timing things, but you will see the shrimp beginning to turn pink, and then you can flip it.  Beware, if you are chatting it up with someone in the kitchen and you forget the egg step, your shrimp will look so very sad:

Coconut Shrimp FAIL, meet legit coconut shrimp

Coconut Shrimp FAIL, meet legit coconut shrimp

Of course, even the sad, un-battered shrimp were yummy.  But do your best to batter them all, okay?  It’s just good manners.

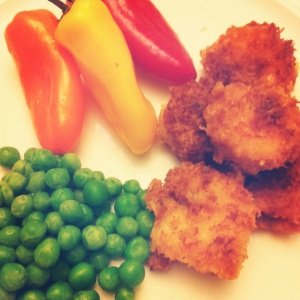
Once your shrimp are ready, just add some veggies–we opted for some frozen organic peas and sweet peppers–and you’ve got an easy, delicious, and healthy meal.  And hey, if you’re craving fried chicken, I don’t see why it wouldn’t work with chicken breast tenders as well.

february 3, 2013 035

Step off, Colonel. This shrimp is finger-lickin’ good.

Make some.  Soon.  You’ll be glad you did.