Challenge 1: Eat More Veggies

I wanted to start our challenges off with something that could be of benefit to everyone.  I also didn’t want the first challenge to be too overwhelming, causing you to throw your hands in the air and quit on the spot.

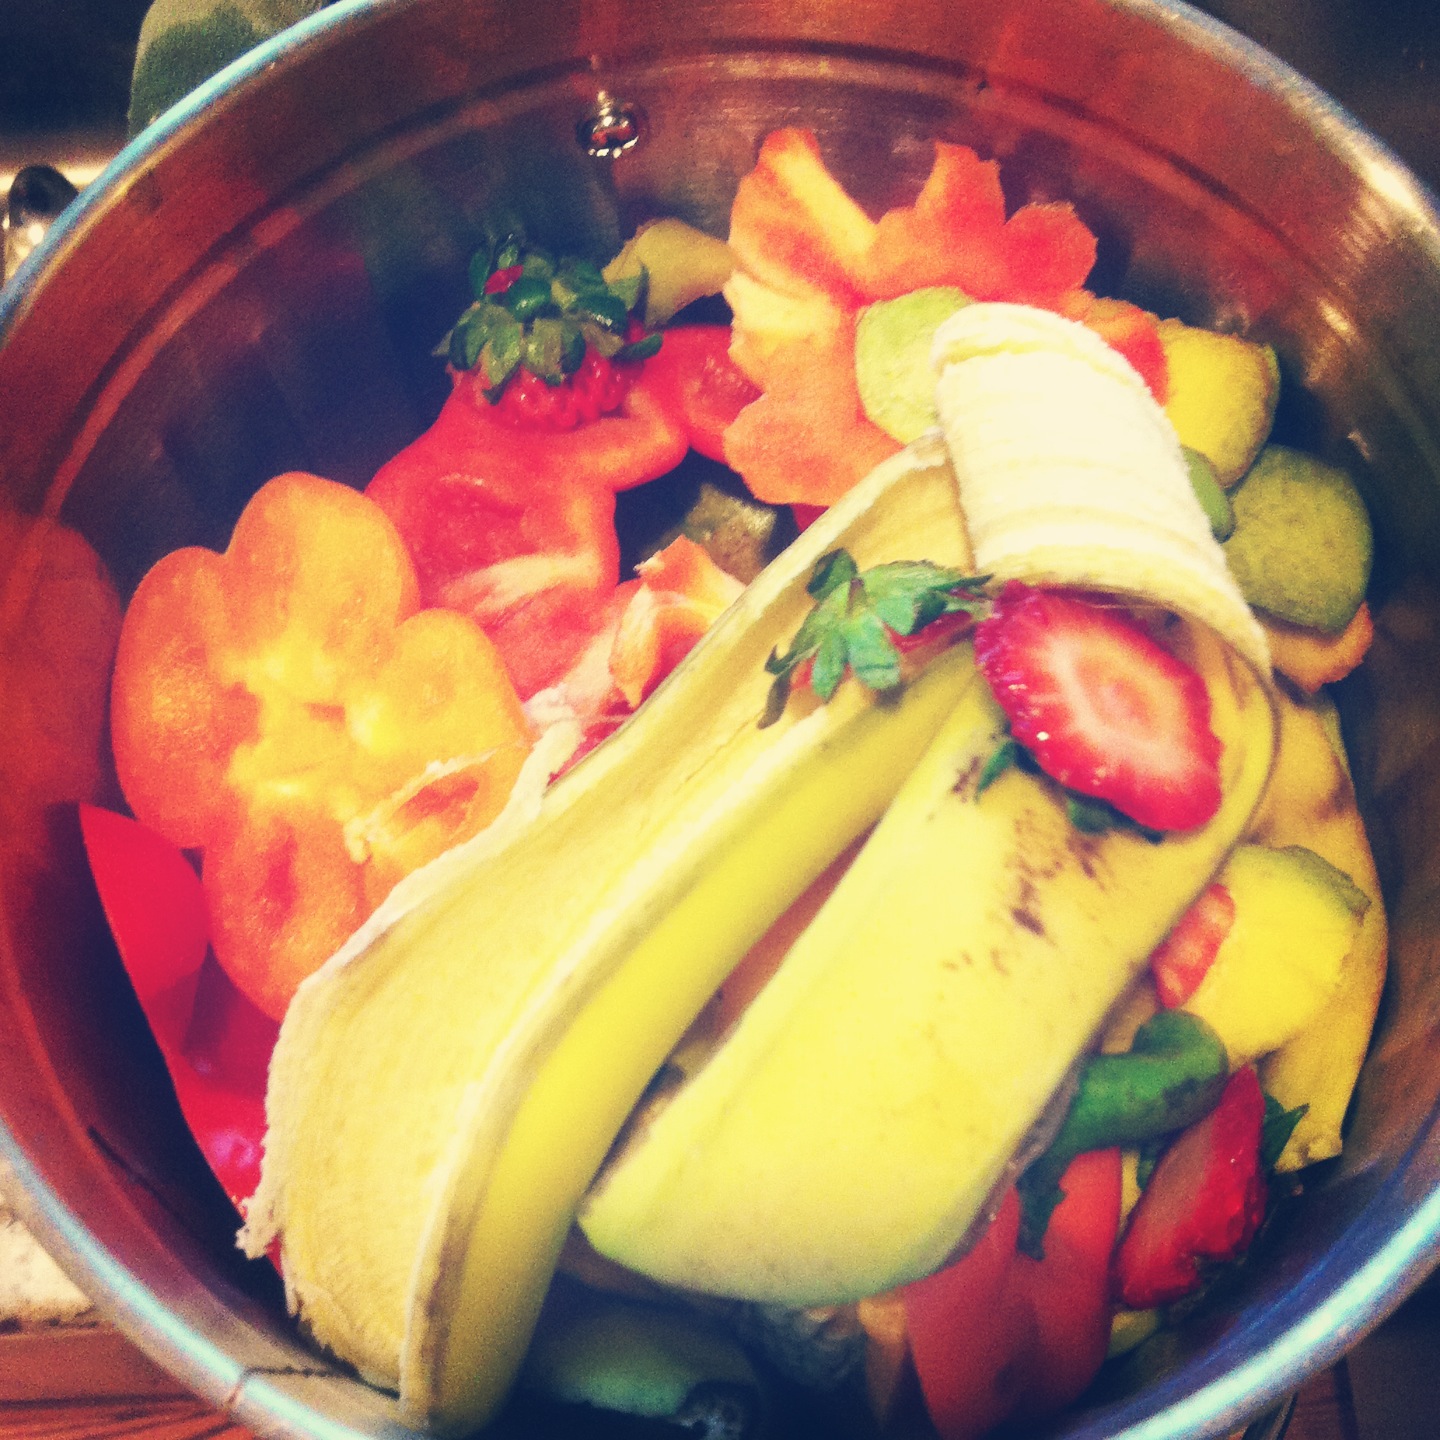
This week, we are going to eat more veggies.  More in quantity and more in variety.  I am challenging everyone to eat at least 3 servings of veggies every day.  And it should be at least 3 different kinds of veggies every day. (a serving of veggies is approximately 1 cup)

Not to open a Pandora’s box or spark up a debate, but for the purposes of this challenge, we are not going to consider corn and white potatoes as veggies, as they really are starches.

Now there are probably 2 camps of readers out there.  One group thinks this sounds like a decent challenge—but not so big that they can’t do it.  The other group are people who are already eating 3 veggies every day (or more).  If you fall into the second group, great!  But join us still.  Maybe you can shoot for 4 or 5 servings of different veggies every day.  Personally I probably eat around 3 or 4, but my kids eat more like 2, so I will be working extra hard on them this week.  I think we can all agree that we can do better in this area!!

Here are some ideas to help you get more veggies into you and your family this week (and from now on!).

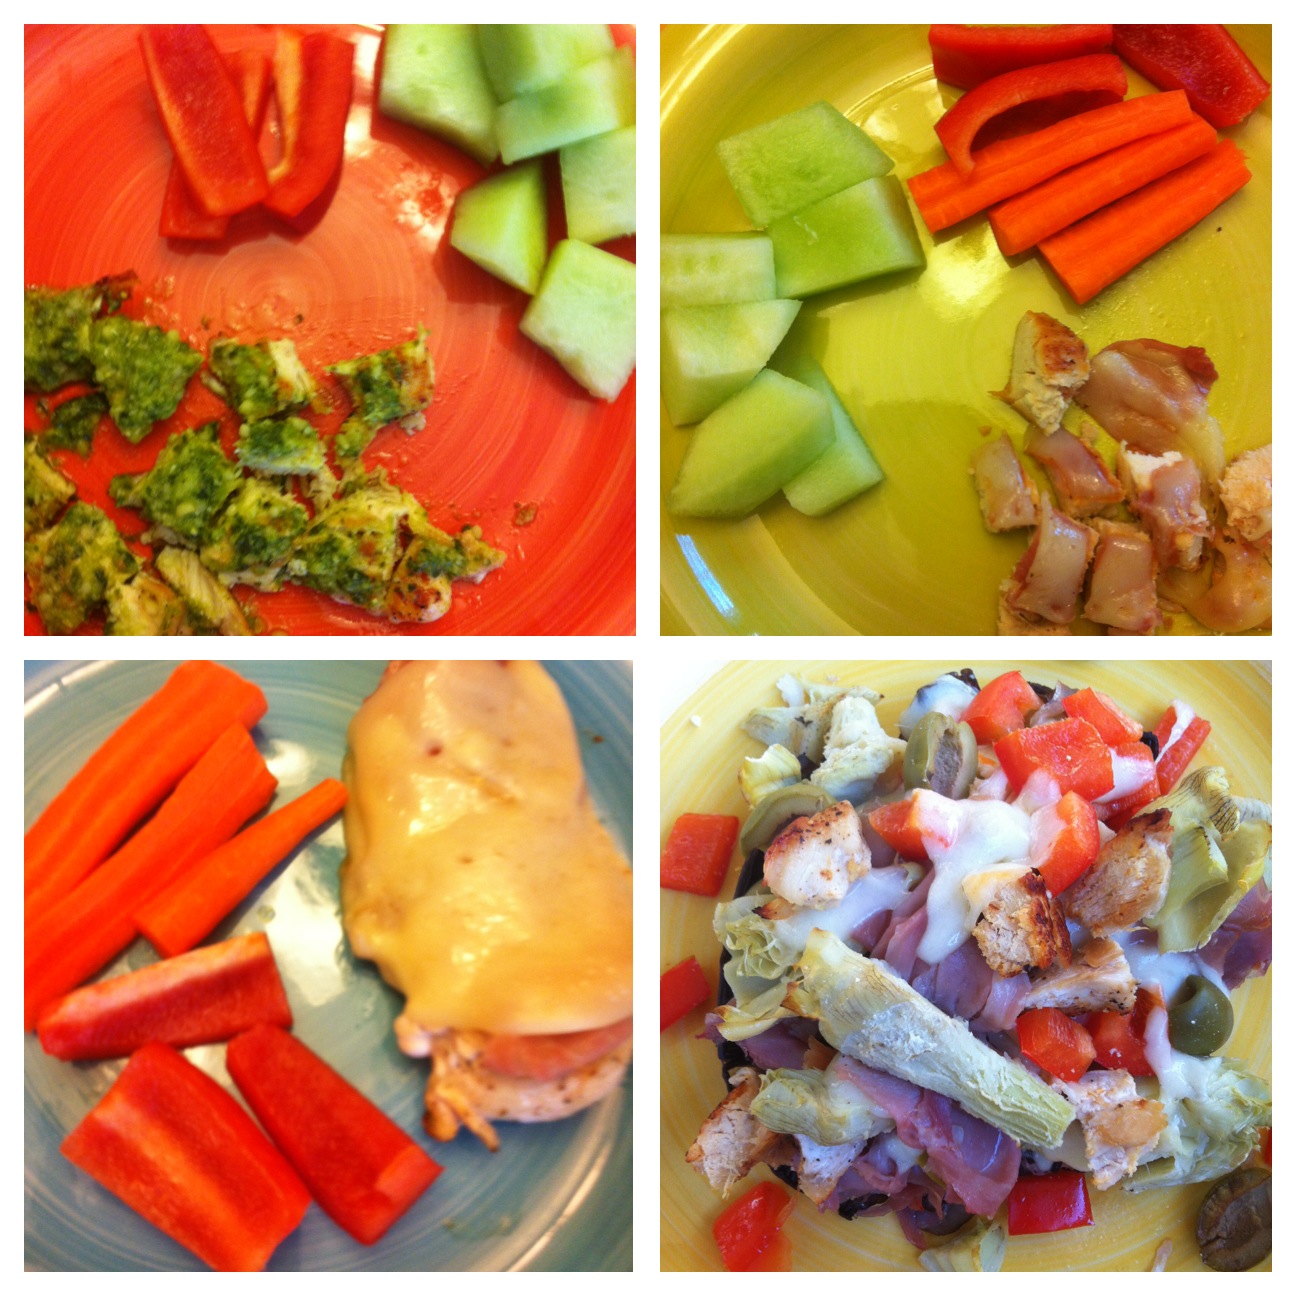
  • Add some veggies to your eggs!  Whether scrambled eggs, an omelet, or a breakfast pizza–mushrooms, onions, bell peppers, spinach, kale, tomatoes all work well!!  If you have a really clean jar of salsa, add some of that too!!
  • Make a “hash” using butternut squash or sweet potatoes as a base.  Wal-Mart sells bags of pre-cubed butternut squash in their fresh produce section.  I grate 2-3 sweet potatoes at a  time in my food processor to use for this.  Add what sounds good to you!  Bacon, sausage, leftover chicken, then just start throwing in more veggies!
  • Snack on veggies.  Keep carrot sticks, celery, bell peppers and cucumbers on hand and eat them with guacamole (make homemade or find a very clean storebought brand–Wholly Guacamole is a good one) or hummus.  (Please note, hummus is not considered Paleo, because chickpeas are legumes.)
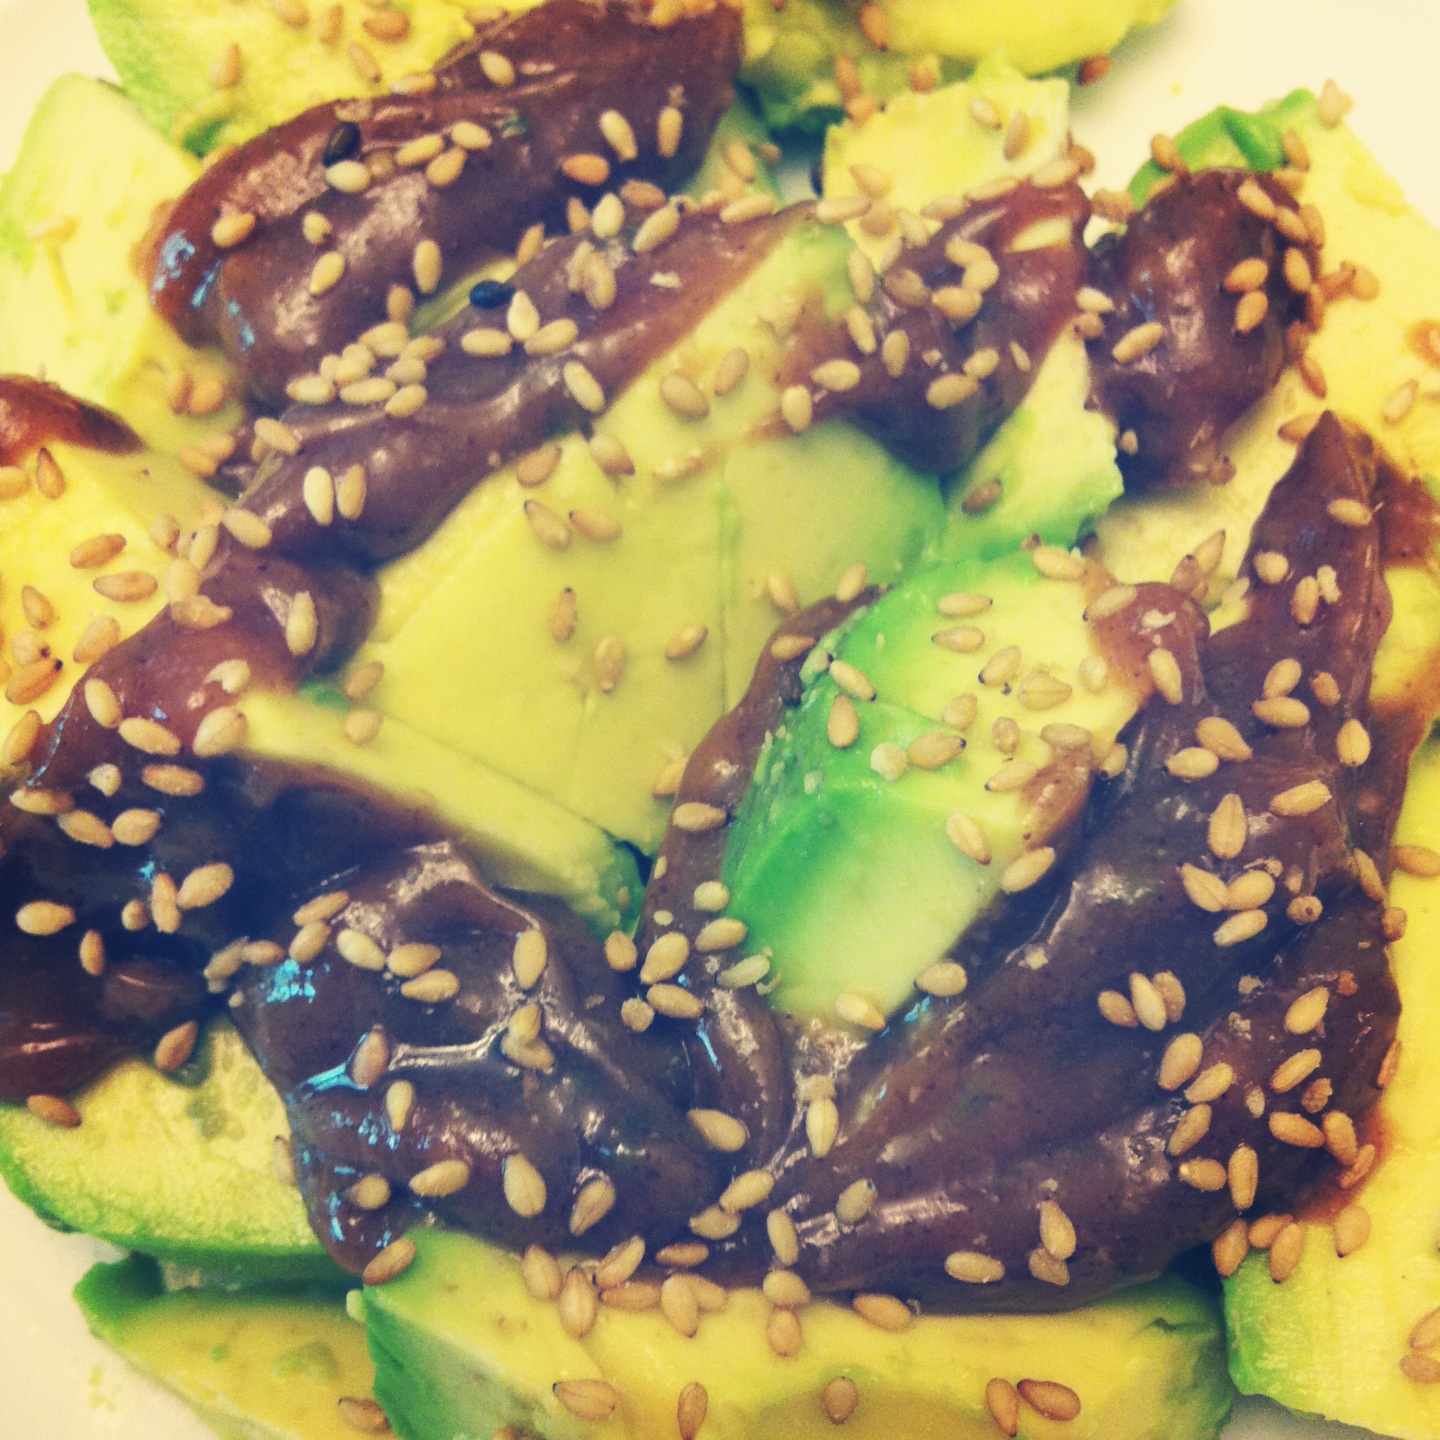
  • A perfect late afternoon snack is a simple sliced avocado.  There are a million ways to dress it up (this paleo pad thai sauce is delicious!), but sprinkled with salt and pepper is a winner every time!
  • When your kids are getting hungry for dinner, but you don’t have everything quite ready, set out a plate of raw veggies.  Catch them at their hungriest and present the veggies in a colorful, appetizing way!
  • Have a pizza….but serve it in a portobello mushroom instead of on a pizza crust.
  • Try cauli-rice!!!
  • Wrap it!  Ditch the bread and have your chicken salad, burger, or turkey sandwich wrapped up in lettuce!  Or try these Asian lettuce wraps.
  • Add some spinach or kale to your smoothie!  If you are new to green smoothies, start with spinach.  It is very mild and you will not notice the flavor!  To mask the green color, use berries–your smoothie will end up nice and purple, so the kids won’t notice either 🙂
  • Grill some kabobs–fill the sticks with onions, zucchini, mushrooms, eggplant!
  • Have a salad, for pete’s sake!!

Don’t forget to get the kids involved.  You might want to keep a little tally on a piece of paper or a dry erase board in the kitchen.  Set the goal for the family (4 veggies/day) and let each child mark a tally for every serving they eat.  To make it even more interesting, offer a reward for if they make or exceed their goal (please do not make the reward junk food!).  Consider offering an extra 5 minutes of electronics or an extra book at bedtime.

Please comment with your tips on eating more veggies, and also let me know if you are going to be participating!  I will do my best to offer encouragement and yummy veggie ideas throughout the week on my Facebook page!

See you in the produce section!!

Let’s Do Better Together

You know what I love?

I have such sweet readers–really I do.  Many of you have no interest in being paleo or grain-free, and yet, you come here faithfully to see what I’m rambling on about.  I have mad love for all of you, and frankly, it’s not my goal to get you all eating paleo.  {GASP!!}  But I really would love to have some small part in encouraging you.  Giving you ideas.  Helping you move a little closer down the road to where YOU want to be.  Feeling healthier, maybe.  Having more energy.  Less aches and pains.  Feeling a little better about what your kids are eating.

With that in mind, I got the idea for weekly challenges.  Each challenge will be designed to get you eating more “real” foods, and will hopefully help broaden all of our horizons.  Basically, I will post a “challenge” every week….for instance, one week the challenge might be something like:

Try 3 new (real, whole) foods this week.

Then I could give you some ideas of more obscure things to try and post links to recipes for you.  I will be participating and doing my best to challenge myself as well.  I am certainly not perfect and have plenty of room to improve!  Throughout the week, we could check in with each other via Facebook and I can be your cheering section.  Seeing what other people are trying might give you ideas, and you might be the inspiration for someone else.  Eating cauliflower for the first time deserves a virtual high five, know what I mean?  And I’m here for you.

All of the recipes I post will continue to be paleo, and I hope you stick with me.  But in the meantime, we can all do better.  So if this sounds good to you, be sure to sign up as a blog follower.  That will ensure that all challenges and recipes get delivered right to your inbox (Facebook likes to limit what you see from me).  If you plan to participate, spread the word to your friends, family and co-workers.  Sit down with your spouse and kids and talk about WHY you want to do this.  Get everyone on board!!  Challenges are even more fun when you are doing them with people you like–especially those that you can see in person 🙂

I will do my best to get the first challenge issued Saturday!

Paleo Pad Thai Sauce (tastes great on Kale!!)

You know one thing I miss from our days of eating processed foods?

Condiments!  I love sauces and dips and dressings and there are literally almost no “clean” condiment options out there.  I have found a few gems, but for the most part have just done without.

But this week, I was making some coconut chicken tenders (a favorite around here!  Just follow my recipe for coconut shrimp but use sliced chicken breast instead of shrimp!!), and was feeling a Thai vibe.  I also had some kale that I really needed to prepare while it was fresh–as my mom would say, the kale “needed to be eaten”.  I, myself, wasn’t feeling overly enthusiastic about the kale, so I thought I would try to liven it up with some dressing.  In keeping with a Thai theme, I tried my hand at making a Pad Thai-type of sauce, and to my delight, my family gobbled up every last bit of the kale!!

First I tore the kale into pieces, discarding the stems.  I heated up coconut oil in a skillet and then sauteed the kale in the oil, just until it started to soften up.  I removed it from the heat and stirred in about half of the sauce–just enough to coat the kale.  It was delicious!

June 14, 2013 079

Paleo Pad Thai Sauce

1/4 cup almond butter

1 TBSP rice vinegar

1 TBSP coconut aminos

2 tsp honey

1/2 tsp minced ginger

1/2 tsp minced garlic

zest of 1 lime

a few dashes of salt

Mix all ingredients in a bowl and let sit for a few minutes for the flavors to meld.  Store unused portion in the refrigerator.  Use within a week.

This sauce is really awesome–you could use it to make Pad Thai with spaghetti squash or zucchini noodles.  I may even try to make Pad Thai with the cauli-rice!  You could thin it out a bit with a few teaspoons of water and use it as a salad dressing.  It makes a great dip for the aforementioned coconut chicken tenders.  And I just drizzled it over an avocado and sprinkled with sesame seeds for a delicious afternoon snack!

June 14, 2013 159

The only question is–what will you do with it?


Breakfast Pizzas (Paleo, Primal, SCD)

When making a dietary shift that involves ditching gluten or grains, breakfast can sometimes be the biggest obstacle.  Especially if you have kids!  The most common items that kids eat for breakfast are typically carb-heavy things like waffles, pancakes, cereal, granola, muffins, or bagels.  Sometimes omelets seems like “adult” fare.  I know that I never had an omelet growing up!

Recently, I was making myself an omelet and I got the idea for this breakfast.  To me, it’s prettier than an omelet, and more kid-friendly.  It’s certainly nothing ground-breaking, but it might be a way to get a paleo/primal foot in the door at breakfast with your kid.

For the boys, I kept it simple with ingredients that I knew they liked.  Eggs, Canadian bacon, and cheddar cheese.  Next time I will probably try adding veggies to theirs.

Get your pan warmed up and use ghee, butter, or coconut oil to grease the pan.  I keep the pan on a low-medium setting the entire time so that the eggs will cook through without burning on the bottom.

Scramble 2 eggs and pour them into the pan.

june 3, 2013 150

Once the eggs begin to firm up around the edges, you can start putting toppings on your “pizza”.  Like I said, for the boys I went simple with Canadian bacon and cheddar.  I let it cook until the eggs were cooked through and the toppings were melted nicely.

june 3, 2013 151

The pizza transferred easily to a plate, and the boys got a kick out of having “pizza” for breakfast.

june 3, 2013 152

For mine, I just scavenged through the veggies in our fridge.  I went with mushrooms (which I sauteed before adding on top of the eggs) and spinach.  I only used 1 egg for mine, and it still worked out very well!  I also added cheddar cheese to mine, and topped it with salsa and homemade yogurt.

june 3, 2013 157

The topping possibilities are endless and can be very specific for your child.  You could also use the toppings to make a design or a happy face in the pizza.  Or if your kids or old enough, let them “decorate” their own pizza!

  Some topping ideas are:  onions, spinach, kale, bell peppers, olives, tomatoes, sausage, bacon, ham, prosciutto, cheese, broccoli, zucchini, mushrooms, scallions, salsa, or fresh herbs.

Of course, I may be biased, but I think my pizza was the most delicious…..

june 3, 2013 158

Liver

Last month, I bought a 10 lb. box of local pastured lamb.  All different cuts of delicious lamb.  I was so excited when I came home and unloaded my box.  I spread out all of my meat to decide what cut to prepare first.  To my surprise, there was a lamb liver included.

To my knowledge, I have never had liver.  But I know that it is healthy.  Liver is full of vitamins and minerals, and organ meats are said to be very healing and nourishing.

So I decided that today was the day.  I didn’t tell the kids outright that we were having liver, not that they would have even known what liver was.  I told them we were having lamb…..which technically was true.

I followed a recipe that someone on my Facebook page recommended to me.  Because once you add bacon, how bad can it be?  I served it with their favorite carrots (roasted with coconut oil, cinnamon, and nutmeg) and french fries.  Yep, I gave ’em straight up white potatoes.  It was like a mental bribe to get them to eat.

So the liver was cooked and served with cut up bacon, onions, and portobellos.  I thought it was okay.  If I cut the liver up small and made sure to get bacon and onions in with each bite, I didn’t notice it at all.  My husband felt the same.  Luigi gobbled it up, no questions asked, which was no surprise–that kid is a carnivore extraordinaire.

But Mario has such a sensitive palate.  I made it a point not to draw any attention to the liver, but noticed that he was making a face when eating it.  Finally, he said sadly, “mom, I don’t think I like the lamb.  Can I just eat my other food?”.  I picked all of the pieces of liver out and set them to the side on his plate and left the bacon, onions and mushrooms in another pile.

Much to my surprise, he picked up a piece of liver and said, “Let me just try the lamb and see if this is really the part I don’t like”.  I was stunned when he said, “Hey, this is the part I LIKED!!“.

So my pickiest child gobbled up all of the liver and left the bacon, onion and mushrooms on his plate.  (I think it was the mushrooms that were grossing him out.)

I would have never predicted 4 clean plates on a night when I made liver.  So I had to share that testimony.  Don’t ever assume that you know what your kids will and won’t eat.  And don’t project your preconceived notions onto them.  No kid is born thinking liver is gross, but if they grow up hearing you talk about how gross it is, then guess what?  They’re not going to touch it.

I am so proud of my son for wanting to “confirm” which ingredient was bothering him!  Honestly, I wouldn’t have thought to ask him to do that.  When liver is involved, it’s easy to assume that’s the culprit.

Will I ever make liver again?  Probably.  And I might even tell my kids that’s what it is……next time.

Firsts

Today I made homemade mayonnaise–lemon dill mayonnaise to be exact.  I’d always heard it was easy, and now I  know that it is.

I also made pretzels.  Again, first time.  Last Friday, my oldest boy had a school friend who was celebrating a birthday.  This friend brought pretzels as a snack to share with the class, which reminded my son how awesome pretzels were.  I didn’t even think paleo pretzels were possible, but I found this recipe and gave it a shot and looky here:

april 27, 2013 019

They aren’t perfect by any means, but once I dehydrate them overnight, I think they will achieve crunchy perfection.  And then I think they will be quite amazing.

I also cut up a whole pineapple–a spiky, poky thing that has always intimidated me.  But whole pineapples were on sale for $0.99 at ALDI and I figured….well, now would be a great time to learn.  And it wasn’t hard at all.

Another first for today is kind of funny.  I garnished our dinner.  I’ve never done that before.  I’ve gotten accustomed to pretty food (so have my kids!) and I added a lemon slice to each plate tonight just because it made me feel happy.

april 27, 2013 020

I guess where I’m going with this post is that once you take those first timid steps and realize….hey, cutting up a pineapple is no different than cutting up a cantaloupe…..or when you make a new recipe and you nail it……or even when you think of a food combination that sounds tasty and it is….

for instance, this candy bar recipe--which is coming soon to the blog.

for instance, this candy bar recipe–which is coming soon to the blog.

….you get confident and suddenly you’re doing something crazy like making pretzels or eating homemade yogurt out of wine glasses—just cause it’s pretty!!

april 27, 2013 006

And to think that when I married my husband 10 years ago, the only thing I knew how to make was meatloaf.

Things change and get strange with the movement of time.  It’s happening, right now, to you.–“Down with the Shine” The Avett Brothers

The Compost Post

Last week, I posted this picture on Instagram (my username there is consideritjoybaking)

april 23, 2013 030

with the caption, “do you compost?”.  I got a lot of feedback from people who want to compost or at least learn more about it , but don’t know exactly where to begin.  So I thought I’d give you my take on composting, complete with pictures.

I will start by telling you why I love it and why I will always compost.  We eat a ton of fruits and veggies and when we were putting that waste in the trash can, it tended to get stinky fast!  Which meant we took the garbage out a LOT!!  Now we have so much less waste going in the garbage and our trash can never stinks (any food scraps that are not compostable can go down the garbage disposal).  We only take out the trash when it is full, which is more like 2-3 times/week versus every day.  I didn’t realize what a difference it was until we went on vacation and every time I opened the trash can it was so stinky!!  Since we take the trash out much less frequently, we are also saving money on trash bags and putting less of them into landfills.  Win-win!

We started composting about 9 months ago, and my initial interest came about because I wanted to use the compost in a garden.  So we did a little research, talked to friends who composted and my handy husband put together a bin for us.  He used wood and chicken wire that we purchased, but I have friends who just built one using a wooden pallet that they found.  You can make yours as fancy or as simple as you like.  Here is a picture of ours up close–we made one with 2 bins, which I will explain.

april 23, 2013 114

The back of the bin backs up against our back fence (which is chain link, hence the trees growing into the bin.  I realize that this isn’t so pretty to look at, but here it is in the grand scheme of our back yard:

april 23, 2013 118

I would argue that the trampoline is more of an eyesore than the compost bin!

So why does it have 2 sections?  Well, we have an active side (the side that we add all of our food scraps, etc. to on a daily basis) and a side that is in the process of “cooking” to become fertilizer.  Because obviously your food scraps do not turn into fertilizer overnight.  They need time to decompose, etc.  As you can see, we have a piece of plywood in front of our “active” side.

april 23, 2013 113

This is simply because our dog has discovered that he has a penchant for melon rinds, and if we don’t keep him out of there, he will climb to the top of the compost pile, which is a very cute and messy canine version of King of the Mountain, and pull out every cantaloupe rind he can find.

You should probably choose a place for your compost bin that is a bit out of the way.  As the food decomposes, there will be lots of little fruit fly type bugs on top of the pile.  I haven’t noticed any other kind of bug problems, although when the pile gets going really well, you will probably find worms in it, and that is a good thing!  Contrary to popular belief, compost piles do not stink.  At all.  I don’t understand how the same food that stinks up a garbage can has absolutely no odor in a compost pile, but trust me when I say it doesn’t.  I have a very keen nose, and I love nothing more than turning my compost!

Every once in a while, you should go out to the pile and (using a pitchfork) literally turn the compost.  It gets these strange layers, like this for instance:

april 23, 2013 116

This is a scoop of stuff I picked up with my pitchfork.  As you can see, some of the stuff is dark, damp and decomposing and right next to that was a layer of completely dry leaves that haven’t’ decomposed at all.  It’s good to mix it all up.  And it is also good to keep the pile damp.  If it hasn’t rained in a while, I will spray the piles down with a hose.

So what can you put in your compost bin?

From the kitchen:  any fruit or veggie scraps or spoiled fruits or veggies, egg shells, coffee filters/grounds, tea bags, leftover pulp from juicing

From the yard:  grass clippings, pine straw, leaves, pine cones, small sticks (although we don’t do pine cones or sticks because they just take too long to break down)

Other stuff:  shredded newspaper, shredded junk mail, hair (I know, random, right??)

Never put any meat or dairy items or processed food in your compost bin.  Or dead animals.  Or dog or cat poop.  Cause……yuck.

Once you have your bin built, you are ready to go.  I remember when we started, I had my husband pour in some grass clippings to start (just put your stuff right on the ground!) and then we just started adding to it.  At first I worried if I was turning it too much or not enough.  Or if I should water it more.  You will also see lots online about adding chemicals to keep it balanced.  Do not stress about compost.

Just take a deep breath, and remember–it’s garbage!!  You’re not going to screw it up any worse than it already is!

If you turn your compost and it smells like fresh dirt or the forest, etc, it’s working.  Recently, the side we are letting cook began to smell like moth balls, which was odd.  I’m sure I could have gone online and found all sort of chemicals to “fix” my problem.  But I figured the decomposition had stalled because I hadn’t added to it in so long.  So I added about 5 banana peels and some coffee grounds (things I thought that would decompose quickly) and sure enough the next day it had that fresh dirt smell again!

Other random tips:

The decomposition process will go faster in the summer than in the winter.  This is to be expected because of the warmer temperatures.

While  you can throw grass clippings into your compost pile, do not throw the weeds you just pulled.  Those seeds are very hearty and will likely “weed up” your flower beds when you spread your compost for fertilizer.

If you spread your compost before it is completely decomposed, you may find some random fruits or veggies growing in your flower beds, due to fruit or vegetable seeds that have not yet decomposed.  This is not the end of the world and it might be fun to see a random cantaloupe pop up in your zinnias!!

Do you have any other questions about composting?  Do you compost or are you inspired to start?

Satisfying Everyone (Without Becoming a Short Order Cook)

Today, I was thinking about what to make for dinner.  As I perused my fridge and freezer, I got a great idea that sounded delicious to me.  The only problem is, I knew that I was the only person in our family who would really like it.  In the past, I would have just told myself to forget it.  As you parents know, making dinner is hard enough without making multiple meals for multiple people.  Or even worse, putting a lot of time into something that you find delicious, only to have the rest of your family complain about it.

Please understand that I do think it is important to have your family try new foods.  Or even new ways of eating foods that they already enjoy.  But sometimes you just know that your efforts are going to be in vain.  For instance I know my kids hate casseroles–all those foods mixed up together, it just doesn’t always fly.  But what if I know that they like 75% of the ingredients that are in a particular casserole? I could reserve some of the cooked meat and veggies from the casserole and serve those to the kids separately, but make the casserole for the grown ups.  See what I mean?

The difference for me lately is that now I am a little more creative in the kitchen.  I also have a lot more ingredients on hand, which allows me to put together a few variations on any dish.  So tonight, I made myself that dinner I was dreaming of.  And with very minimal effort, I made sure that everyone had a dinner they were happy with.  Here’s what I did…..

First of all, what sounded good to me was a portobello mushroom stuffed with chicken, artichoke hearts, olives, bell peppers, prosciutto, and smoked provolone.  But I knew that wasn’t going to fly with the rest of the family.

So I cooked some chicken breasts on the stovetop.  Just seasoned them with salt, pepper and garlic powder and cooked them on both sides in ghee while the oven was preheating.  While they cooked, I prepared the portobello by scraping out the gills and rubbing it with olive oil.  Then I cut up some raw veggies to serve with dinner (I set aside some diced bell peppers for my meal).

I took one cooked chicken breast for myself and diced it up and mixed it with all of the other ingredients I wanted to add to my portobello, then tossed it in the oven at 400.  Then I topped 2 other chicken breasts with prosciutto and smoked provolone because I knew my husband and youngest son would like that.  I topped the last chicken breast with pesto for my oldest son.  Easy as that!

april 7 001

Everybody got a meal that they enjoyed and my effort was very minimal.  Obviously this doesn’t work with every single meal, but if you think ahead, you can handle it.  I think we can all agree my meal was the most beautiful and delicious.  But it tasted even better knowing that everyone was happy.

april 7, 2013 074

On Embracing It

Last night after I put the boys to bed, I was tired.  My husband was working late, so I had done the afternoon/evening routine alone–including an impromptu Costco trip.  I came downstairs and bypassed the couch, heading instead into the kitchen, where I started started soaking 12 cups of nuts for granola.  Then I rolled out and baked 2 batches of graham crackers and put them in the dehydrator.  And I pureed some cashews to ferment in the dehydrator overnight to turn into sourdough bread today.

I was tired.  And I was kind of headache-y.  I’m not telling you this because I’m trying to be a martyr–I’m not.  I’m telling you this because I surprised myself.  Because within minutes of trudging into the kitchen, I was re-energized.  I was singing along with Mumford and Sons on my ipod, and even dancing a little.  Sure, it could have been the new blonde roast Starbucks that I snagged myself on the way to Costco, but I think it was something else.

I enjoy this.  I love this.  I love my life.  And had you told me a year ago that this is my life, I would have been horrified.  Horrified, I tell you!!

But I love it.  And I feel more fulfilled than I’ve ever felt.

And I feel like I need to tell you that.  I’m not someone who came from a long line of food lovers and always dreamed up recipes in my spare time.  I fell into this quite randomly….through very troubling circumstances.  And I landed exactly where I was supposed to be all along.

I know a lot of people like my recipes and the Paleo lifestyle because they are into Crossfit and ripped bodies and super-health, and I love that!  It is awesome.  But there are others of you who are here as a last resort.  For your health or your child’s health, and I know it’s scary and it sucks at first.  But give it a chance.

It’s true–you may never like baking or spending time in the kitchen.

Or maybe you’ll find out that you love it.

Maybe you are going to meet your new best friend when you find out your kids both have similar food issues.  Maybe you are going to become an advocate for autism or Crohn’s or leaky gut and help others learn that diet can help in some instances.  Maybe you will simply and quietly remove all foods with artificial colors from your home, and that’s all you will do.

But isn’t that something?

Just embrace it.

“I will learn to love the skies I’m under.”–Mumford and Sons


Almond Flour vs. Coconut Flour

Now that you’ve been reading here with me for awhile, you know why I use almond and coconut flour to bake with (no grains–holla!), but I realized that I’ve never explained why I tend to use them together, or their baking properties or anything like that.  So let’s talk grain-free flours.

First of all, nutrition-wise they are both awesome!  Almond flour is full of healthy monounsaturated fats, vitamin E and magnesium.  It also packs a protein punch!  Here’s a great post from Elena’s Pantry that goes really in depth about why almond flour is the cat’s pajamas.  Coconut flour is high in fiber and protein, and has a naturally sweet taste–which is ideal for baking.

In all of my muffin recipes, I use a combination of almond and coconut flour.  One reason I do this is that it cuts the cost of the recipe.  Before I explain this completely, you should know that a little coconut flour goes a long way.  It is a very thirsty flour and you don’t have to use much of it.  That is one reason that many recipes that solely use coconut flour also call for an ungodly amount of eggs.  Coconut flour soaks up moisture like crazy!  So back to price.  As it turns out, almond flour and coconut flour cost about the same price per pound.  But when baking you only have to use a very small amount of coconut flour vs almond flour.  So consider this….let’s say that a cup of almond or coconut flour costs $2.50.

If I have a recipe for muffins that calls for 2 cups of almond flour, the total cost alone of flour for that recipe is $5.

But if I decide to sub in some coconut flour for almond flour, I would do this:  3/4 cup almond flour + 1/4 cup coconut flour (and add an egg for extra moisture).  That brings the total cost of flour for the recipe down to $2.50, so it is well worth it to make the change!!  This doesn’t compromise the taste or texture of the recipe (in my opinion).

I would not usually ditch almond flour solely to bake with coconut, and the ratio above is only one I can vouch for in muffins or sweet breads.  I am normally not a fan of baked goods made only with coconut flour (although they do work well sometimes, it’s just not my preference).  If a recipe has too much coconut flour, sometimes the baked good in my mouth feels a little heavy and hard to swallow.

Another reason that I think it’s a good idea to sub out the some of the almond flour in a recipe is because almond flour has recently gotten some press for being high in Omega 6 fatty acids.  Now don’t freak out–you can read the article I linked to find out more about it.  And remember, you can find articles floating around the interwebz to support or bash nearly any health theory there is.  The gist of this theory is that eating too much of these Omega 6’s can cause inflammation–the exact thing we are trying to eliminate in our body by eating this way in the first place.  My theory is don’t overdo it!  If you ditch a standard American diet just to go paleo and eat strictly baked goods made with almond flour, that isn’t ideal.  These are treats, and you should be eating more meat, fruit and veggies than baked goods anyway.  But it makes me feel a little better to lower the amount of almond flour and sub in some coconut flour (and therefore extra fiber!) because my boys do love their baked goods.  And hello?  They are kids.  I hate to tell them no, especially when I feel really good about the ingredients I bake with!

I hope that was a good intro lesson on the difference between almond and coconut flour and why I use them both together a lot (I promise it’s not because I enjoy sending you out on wild goose chases at the supermarket).  If you have any other questions, just ask away!  If I don’t know, I will research it, and we will learn together.