Everything Crackers (Paleo, SCD, Nut-free)

Every once in a while, my body needs a break from eating nuts.  Mostly because I tend to go overboard with them.  I can’t seem to eat just a handful of pistachios….I have to eat a cereal bowl full of pistachios.  You get the point.  And while nuts aren’t nearly as inflammatory as grains, when you go overboard with them, they can cause issues.  Lately I have had a lot of neck pain that is causing headaches.  So in addition to seeing my chiropractor, icing my neck every chance I get, and getting decadent scalp massages from my husband, I am taking a break from nuts for a few weeks.

Which naturally meant that I had to invent a new nut-free snack—STAT.

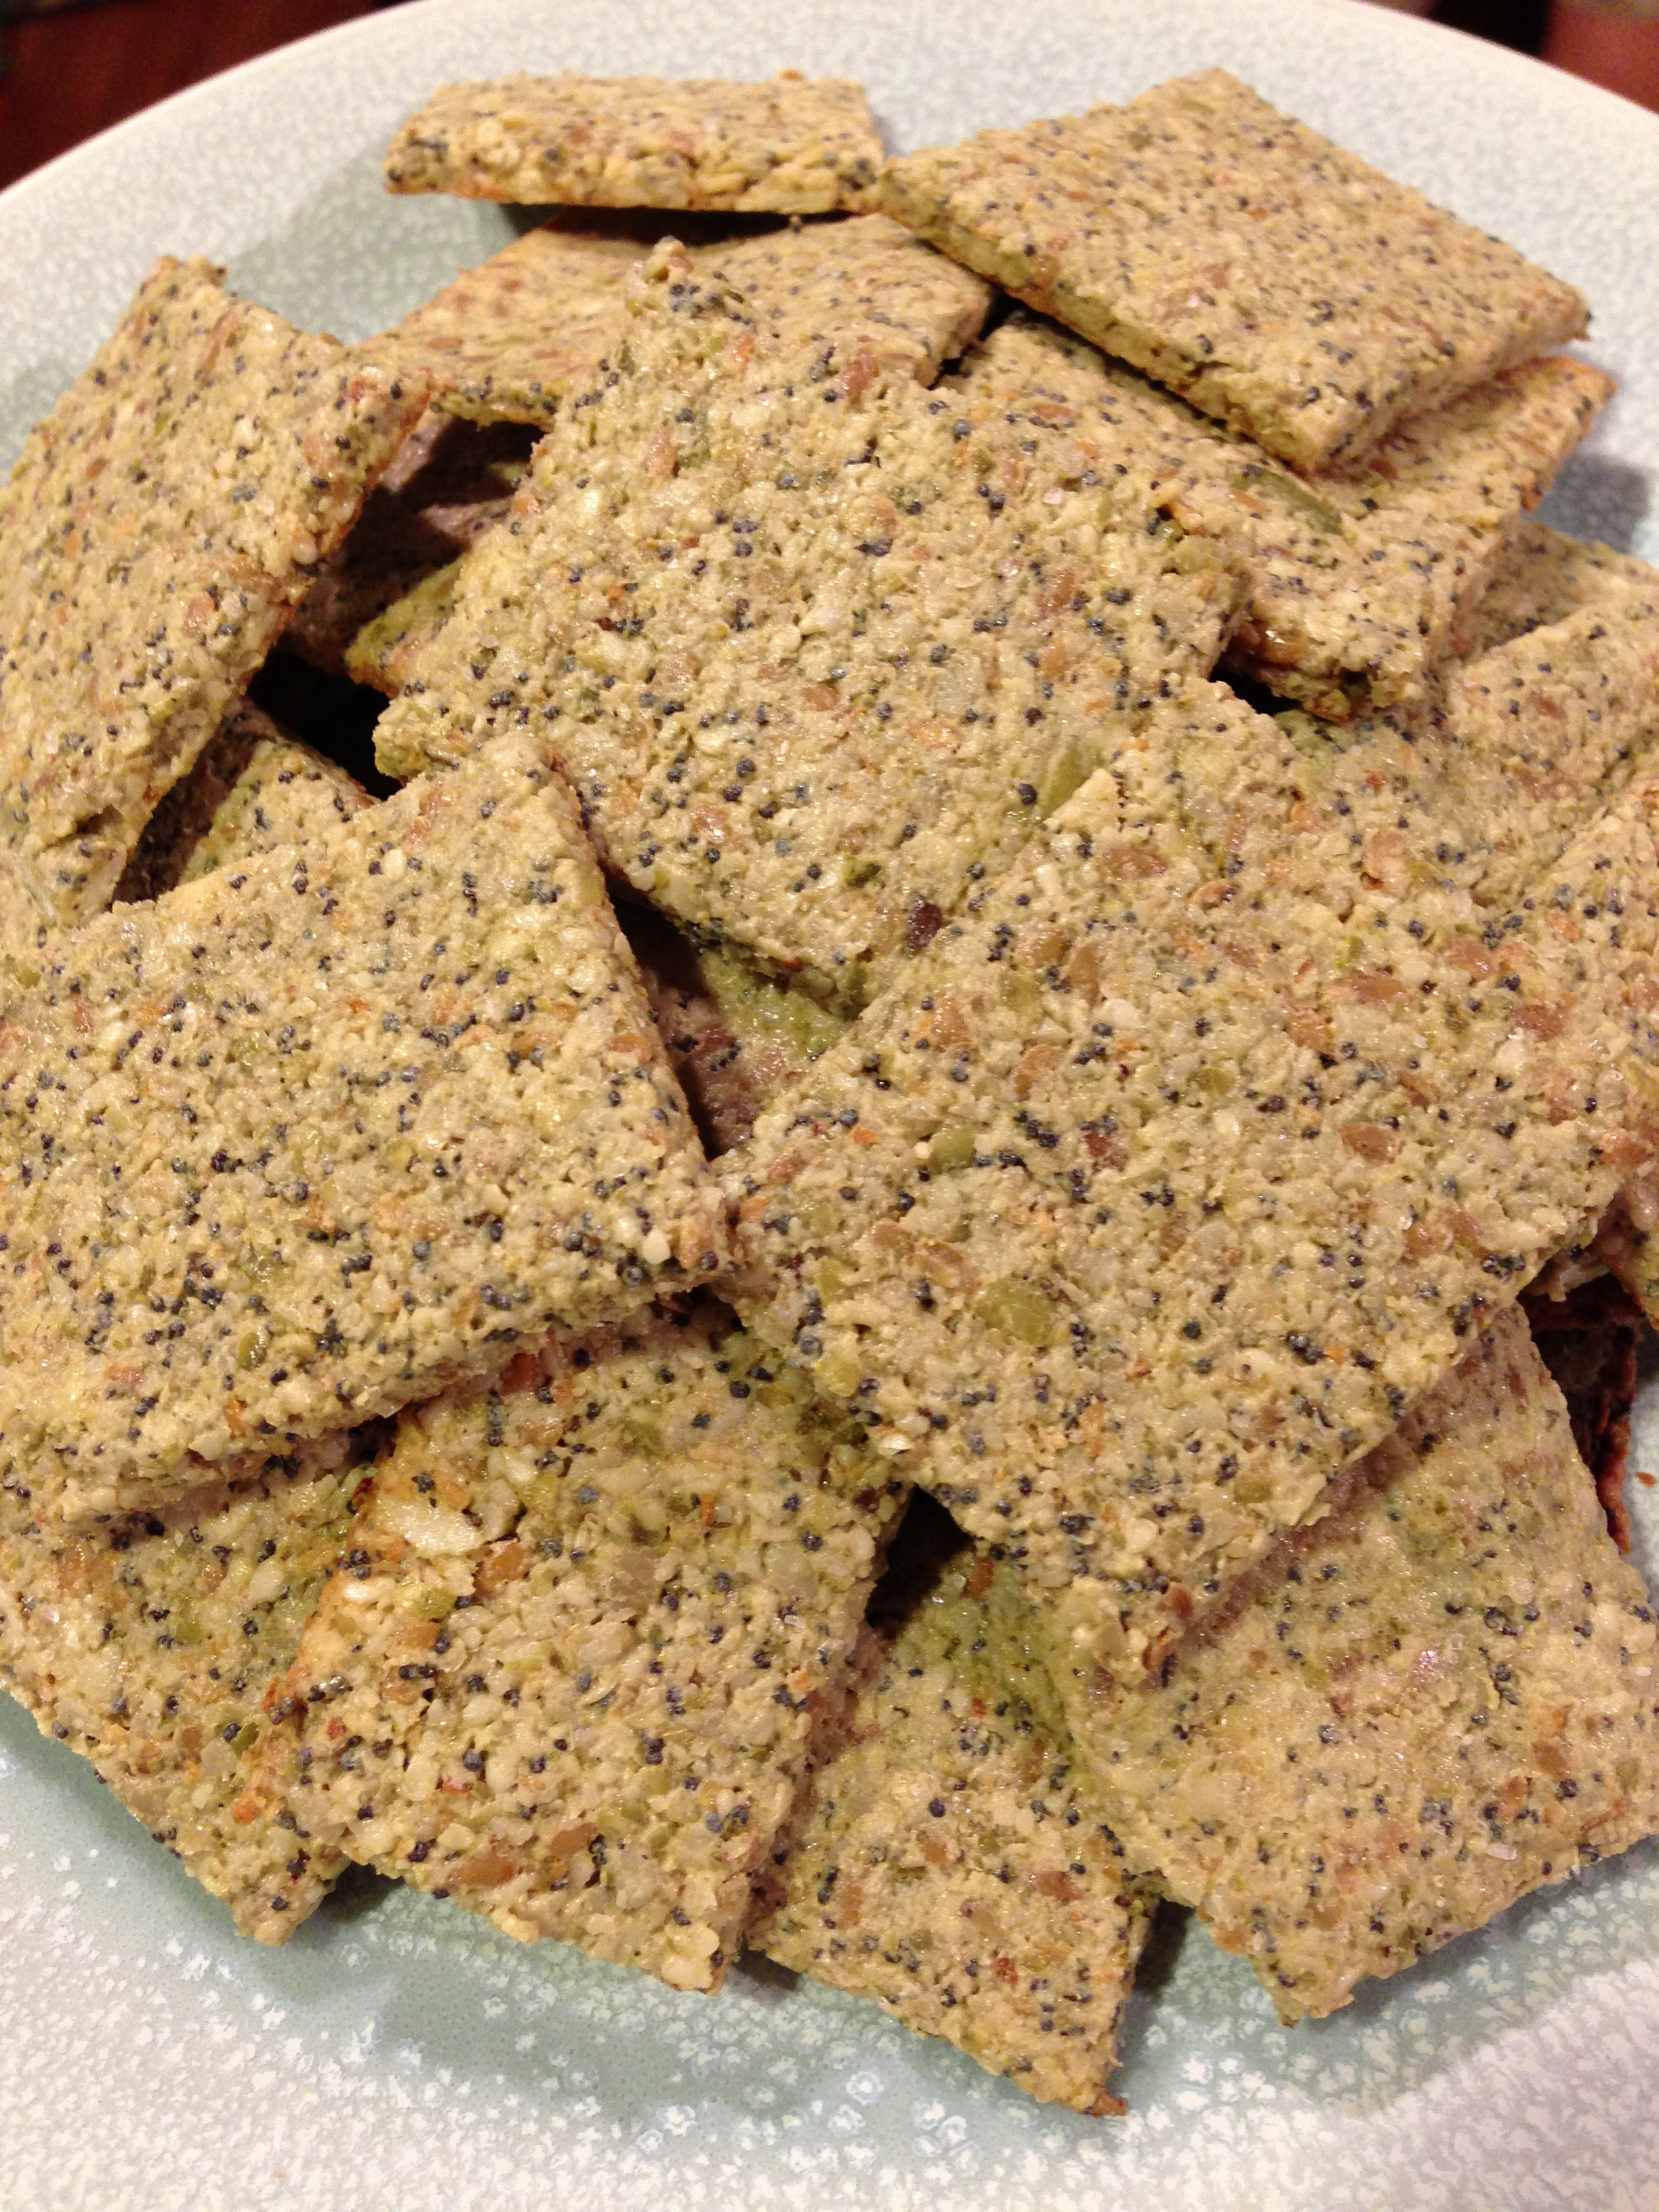
These crackers are inspired by Everything Bagels.  I used to love those, but even in my bread eating days, they were a little bread-y for me.  I mostly loved the savory-ness of them, and that is what I wanted to capture in this snack.  The base of the cracker is all seeds and I was impressed with how crunchy they got in the oven.  I put all of my crackers (except the Parmesan cheese crackers) in the dehydrator because it helps them stay crunchy for days and weeks, but I really feel like these crackers would work in the oven.  They might only keep for a few days, but let’s face it…..you’re probably going to eat them all in a few days anyway 🙂

Everything Crackers

1/2 cup + 2 TBSP raw pepitas (pumpkin seeds)

1/2 cup raw sunflower seeds

2 TBSP sesame seeds

2 TBSP flax seeds (if you don’t have these on hand and don’t want to buy them just sub in extra sunflower seeds here)

1 TBSP poppy seeds

1 TBSP dried minced garlic**

1 TBSP coconut aminos

1 egg

1 tsp. sea salt

1/4 tsp. pepper

1/4 tsp. onion powder

**If you also have dried minced onion on hand, try it with 1/2 TBSP minced onion, 1/2 TBSP minced garlic and omit the onion powder.  This was my intention but I didn’t have any dried minced onion.  Either way, they are delicious.  Just giving you options :)**

Preheat oven to 350.

In a food processor, pulse 1/2 cup sunflower seeds and 1/2 cup pumpkin seeds until they resemble a meal/flour.  Add all other ingredients (including the remaining 2 TBSP of pumpkin seeds) and pulse to combine.  You want there to be visible seeds in the crackers.

Spread your mixture onto a sheet of parchment paper.  Then cover with another sheet of parchment paper.  Use a rolling pin to roll the crackers out.  I talk more about rolling out crackers on my Parmesan cracker post if you are interested.

August 30, 2013 298

Use a pizza cutter to cut them into whatever size you prefer.  Sprinkle with a little more sea salt.

Transfer the crackers and parchment paper to a cookie sheet and bake for approximately 10-15 minutes.  The baking time will depend on the thickness of your crackers.  Just remember that crackers are very thin and can burn very, very quickly.  Watch them closely!

After my crackers began to brown around the edges, I transferred them to my dehydrator for 3-4 hours to achieve the perfect crunch.

If you don’t have a dehydrator, try baking them at 275-300 for a longer period of time.  I was pleasantly surprised to see the crunch that the oven produced on these crackers.  Please let me know if you make them and what your experience was!!

August 30, 2013 304

Paleo Mint Chocolate Chip Ice Cream

Recently my son was bemoaning the fact that he doesn’t eat candy anymore.  Granted, we do allow the boys to cheat every once in a while, but it is far from a free-for-all at our house.  I asked him his very favorite candy and his answer was:  mommy’s favorite Christmas candy.

Ahh, peppermint bark.  Yes, I have been known to eat a bar (or twelve!) of Ghiradelli peppermint bark during the holiday season.  Last year, I started giving the boys little nibbles of it, and they were hooked as well.

So when I announced that I bet I could make an ice cream that tasted like mommy’s favorite Christmas candy, Mario’s eyes nearly bugged out of his head!

I know that most store bought mint chocolate chip ice cream is green, some is even just plain white, but in the spirit of the candy cane, I used India Tree natural food coloring to make ours a pale pink.

Peppermint chocolate chip ice cream is a perfect flavor for a hot summer day…..or to eat while admiring your Christmas lights.  Meanwhile, Mario has declared it the best ice cream ever.  Maybe even the best thing he ever tasted.  I tend to agree…..

Paleo Mint Chocolate Chip Ice Cream

2 cans full fat coconut milk (preferably chilled)

1/2 cup honey

1 tsp. peppermint extract

2 tsp. vanilla extract

1/2 cup enjoy life chocolate chips or other soy/dairy free dark chocolate, coarsely chopped

India Tree red food coloring (optional)

Combine all ingredients and add them to your ice cream maker.  Prepare according to the ice cream maker instructions.  Enjoy!!

August 2013 012

Smoked Salmon, 2 Ways

Fall is coming soon, and these last few weeks of summer are a great time to start experimenting with healthy lunchbox options for the school year!  Today, at lunchtime, I looked in my fridge and saw some smoked salmon.  I knew it could be a quick and tasty lunch, but racked my brain to find a way to make it fun for the boys.  They were delighted with what I came up with and each of them agreed that they would like to take these in their lunchboxes this fall when school starts.

First I made some salmon and cucumber “sandwiches”.  I kept it simple for my oldest son, by just placing the smoked salmon between 2 slices of cucumber.  Paired it with some fruit and cheese cubes, and it was a super simple lunch!

August 3, 2013 007

For my younger son, who is a bit more adventurous, I mimicked a sushi roll (without the rice of course).

August 3, 2013 008

Started with small sheets of seaweed, and added smoked salmon and cucumbers.  Cream cheese and/or avocado would also be delicious additions here.  Maybe some grated carrots if you don’t have cucumber.  That would add a nice crunch and some color!  For my husband and I, I added some goat cheese.  I have to say, these were a bit messier than making a PB&J, but when it comes to lunch packing, they are so much healthier and didn’t take any time at all!  If you are good at rolling them up, and have a better presentation than me, you might even be able to serve them as little appetizers at a get-together!

August 3, 2013 009

So tell me…..would your kids eat this?

Chipotle Lime Chicken Jerky (Paleo, SCD)

I would love to say that I came up with this one all on my own, but I have to give credit where credit is due.  I was searching online for paleo beef jerky marinades and I came across a message board here.  All the way at the bottom, someone named Joshua gave this recipe.  I made a few very small tweaks and it is GENIUS!!!  Even better, it tastes AMAZING on chicken, which is great because clean, organic chicken is much more affordable than grassfed beef.  I love it because it is a change from that soy sauce/brown sugar typical-tasting jerky.  It has a kick but both of my 6-year old boys can tolerate it.

Not only is this a guilt-free snack (rarely do you hear someone complaining that they have GOT to stop eating organic chicken!), but it is great for snacks on the go, road trips….and even lunchboxes.  Oh yes, lunchbox time is coming soon.

So without further ado…..

Chipotle Lime Chicken Jerky

3 lbs of boneless, skinless organic chicken thighs

2 TBSP smoked paprika

1 TBSP fresh cilantro

1/2 TBSP black pepper

1 TBSP sea salt

1 clove minced garlic

juice of 1 lime

1/4 cup coconut aminos

1 TBSP honey

1 tsp cumin

1 tsp oregano

Slice your chicken thinly (sometimes it helps for the chicken to be firmer, so if you need to put it in the freezer for about an hour beforehand, that will help.)  1/4 inch slices are probably ideal, but if it’s a little thicker it’s not going to be the end of the world.  Remove any larger pieces of fat (there is no harm in leaving it there, but they will be more likely to spoil).  Combine all of the other ingredients for the marinade.  Place chicken and marinade in a large container and refrigerate.  Marinate for 8-12 hours.  Remove chicken from marinade and place chicken in a single layer on your food dehydrator trays.  Dehydrate at 155 degrees for approximately 6-8 hours.  The time will vary based on how thick your slices are.  You may want to flip the jerky at the 3 hour mark.  Just keep an eye on it, and remove it when it resembles jerky!

If you do not have a food dehydrator, I know this can be done in your oven as well.  I did some googling, and this website gives some instructions on how to make jerky in your oven.

Enjoy!

August 3, 2013 012